Cyber Forensics using FTK Imager. Introduction to NTFS.
Explore FTK Imager's interface and NTFS files. This free cyber forensics tool is packed with features for comprehensive data analysis.

In this blog I am going to show the interface of FTK Imager tool and talk about various files of NTFS. FTK Imager is a widely used tool in Cyber Forensics. I like this tool is because it has so many features and yet it is a free tool. If you don’t have FTK Imager tool then you can download it from exterro.com.
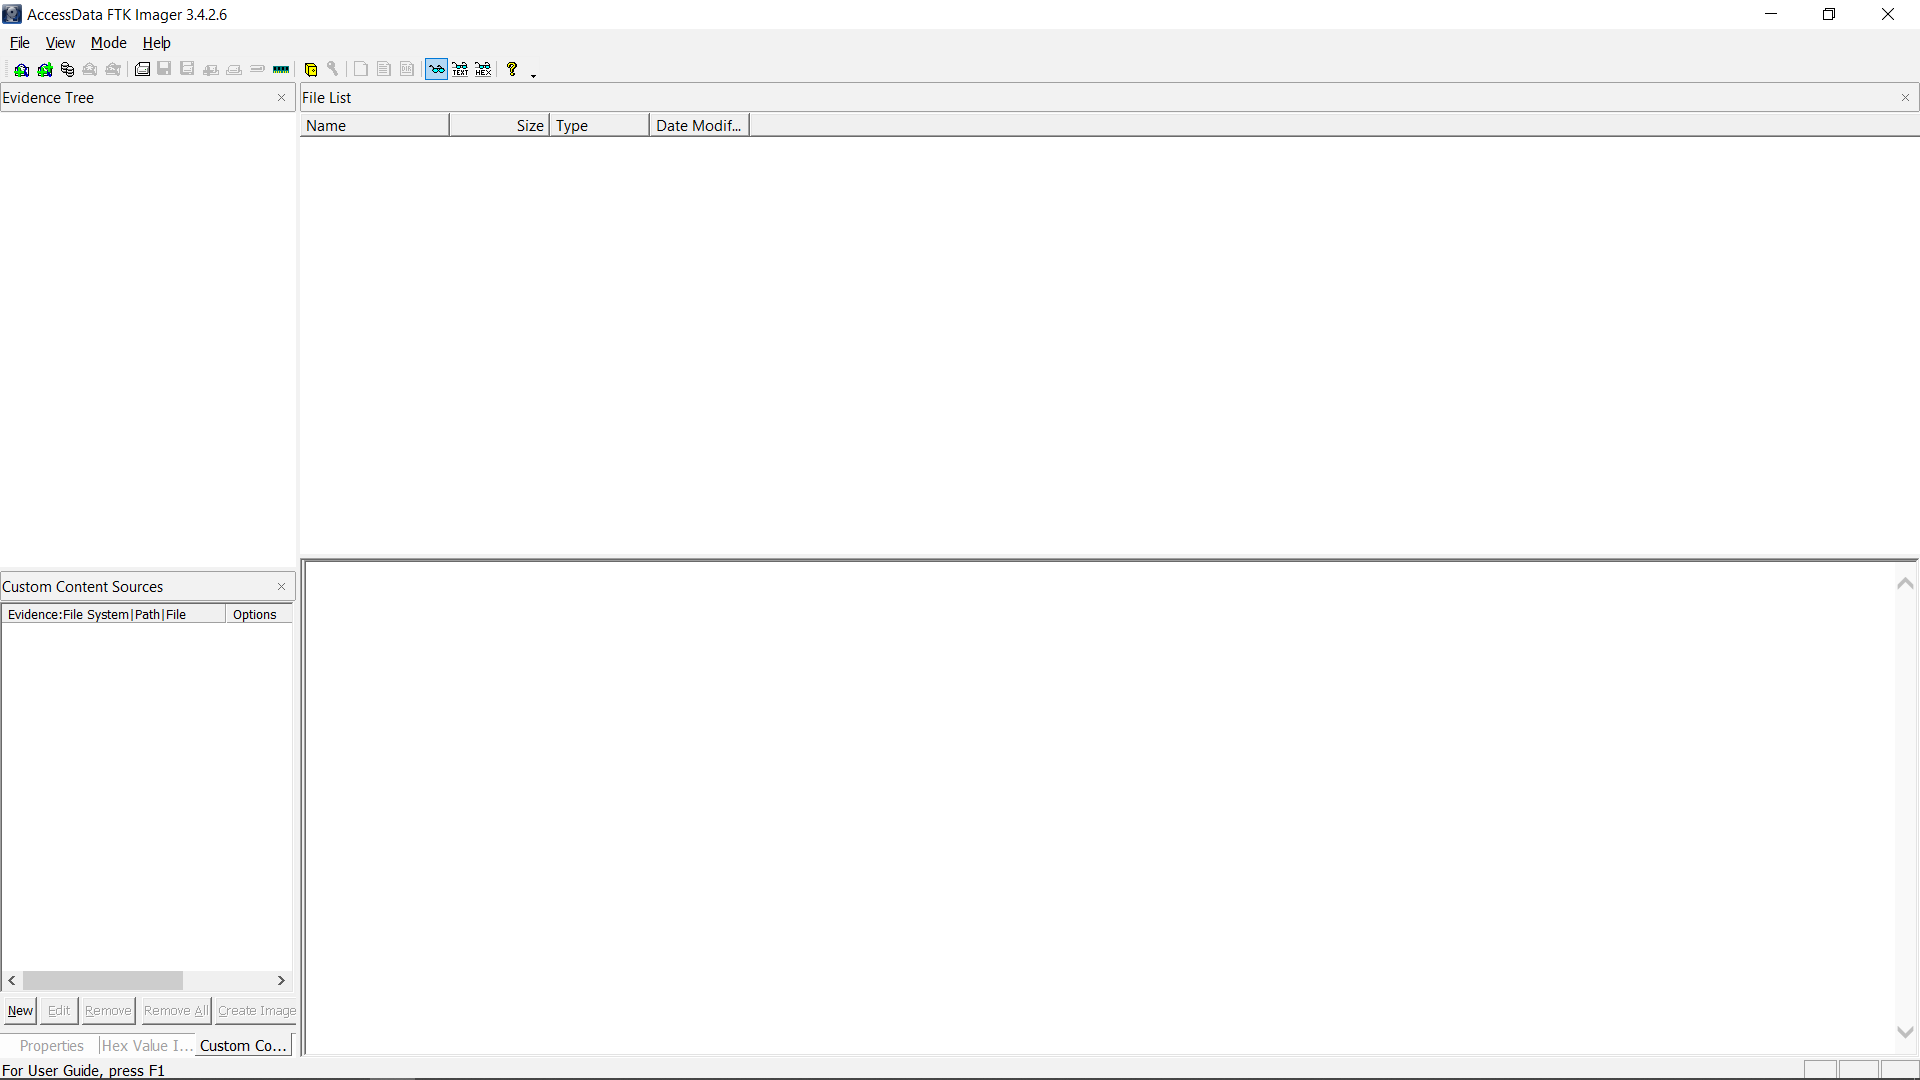
You can do the following on the home screen:
- Add evidence item
- Create image of RAM
- Create image of DISK
- Various options of image available
- Read an evidence item cluster by cluster
- Search for suspicious keyword in evidence item
And the list goes on and on. That’s why it is a vast and helpful tool in forensics.
1. Various files present in NTFS
New Technology File System (NTFS) is a widely used file system in Windows operating system. This file system has some default files which it creates for itself to keep a track of all the files in a disk, just like an index keeps all the track of all the pages of a book. Before moving forward let me tell you basic architecture of a disk.
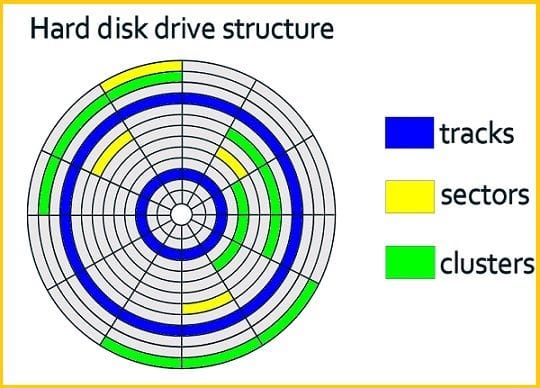
The cluster is a group of sectors. Sector is the smallest part of a disk with the fixed size of 512 bytes. Generally when you format a disk, you get an option to choose the size of a cluster.
1.1 Why to choose cluster size?
It is a good practice to keep the size of a cluster as small as you can, mostly recommended to 4096 bytes. For example, when you create a text file, like "test.txt", usually the text file is not very large. Even if it is large (4090 bytes in our case), its size wouldn’t be the multiple of the cluster size. Let's suppose the cluster is 8192 bytes. The size of the file is less than the size of a cluster. The remaining 4102 bytes will be wasted on the cluster (not exactly wasted but it will come in use until the disk is almost full). This free space is known as slack space. Some of the criminals take the advantage of this slack space to store some hidden data in the disk.
IMPORTANT: Note the following things in above example:
- Size of sector is 512 bytes (always fixed).
- Size of 1 cluster is 8192 bytes i.e. 16 sectors.
- Size of file is 4090 bytes (Or 7 sectors and 506 bytes).
- Actual number of sectors used by file is 8 (7 fully and 8th partially).
- Slack space calculated for above file will be 8192-4090=>4102 bytes.
- The slack space of 4102 bytes is divided into two parts: RAM Slack and File Slack.
- RAM slack is the number of bytes left in the sector. In this example the 512-506=>6 bytes is the RAM Slack. Why 512? Because the size of 1 sector is 512 bytes and the file is stored in only 7 sectors fully and 506 bytes of 8th sector. So the space which is left in 8th sector i.e. 512-506=>6 bytes is the RAM Slack.
- We now know the RAM slack as 6 bytes. Therefore 4102-6=>4096 bytes is the File Slack, i.e. 8 sectors. 8 sectors are wasted because of choosing 8192 bytes cluster. If we would have chosen 4096 bytes clusters then this wastage would have reduced to only 6 bytes RAM slack, and no File Slack would be there at that time.
- RAM Slack is used by RAM as a dump.
I hope you have got from the example used above what is a sector, cluster, slack space and why it is necessary to choose small cluster size. Now one more thing. If the cluster size is bigger, then the fragment will be smaller which would enhance the reading and writing speed and also be good for indexing. Fragment is a portion of a file that are not stored contiguously on the disk. When a file is broken into smaller pieces and spread across different areas of the disk, these pieces are called fragments.
Remember in the last paragraph I wrote a statement "not exactly wasted but it will come in use until the disk is almost full". So how is it possible in NTFS file system? We have various hidden files (note that this hidden file is not same as hidden file you create). These hidden files are created by default as soon as the disk is formatted with the NTFS file system, and the name of these files start with $.
2. How to see hidden files?
Follow the steps to see hidden files:
1. Go to File > Add Evidence Item
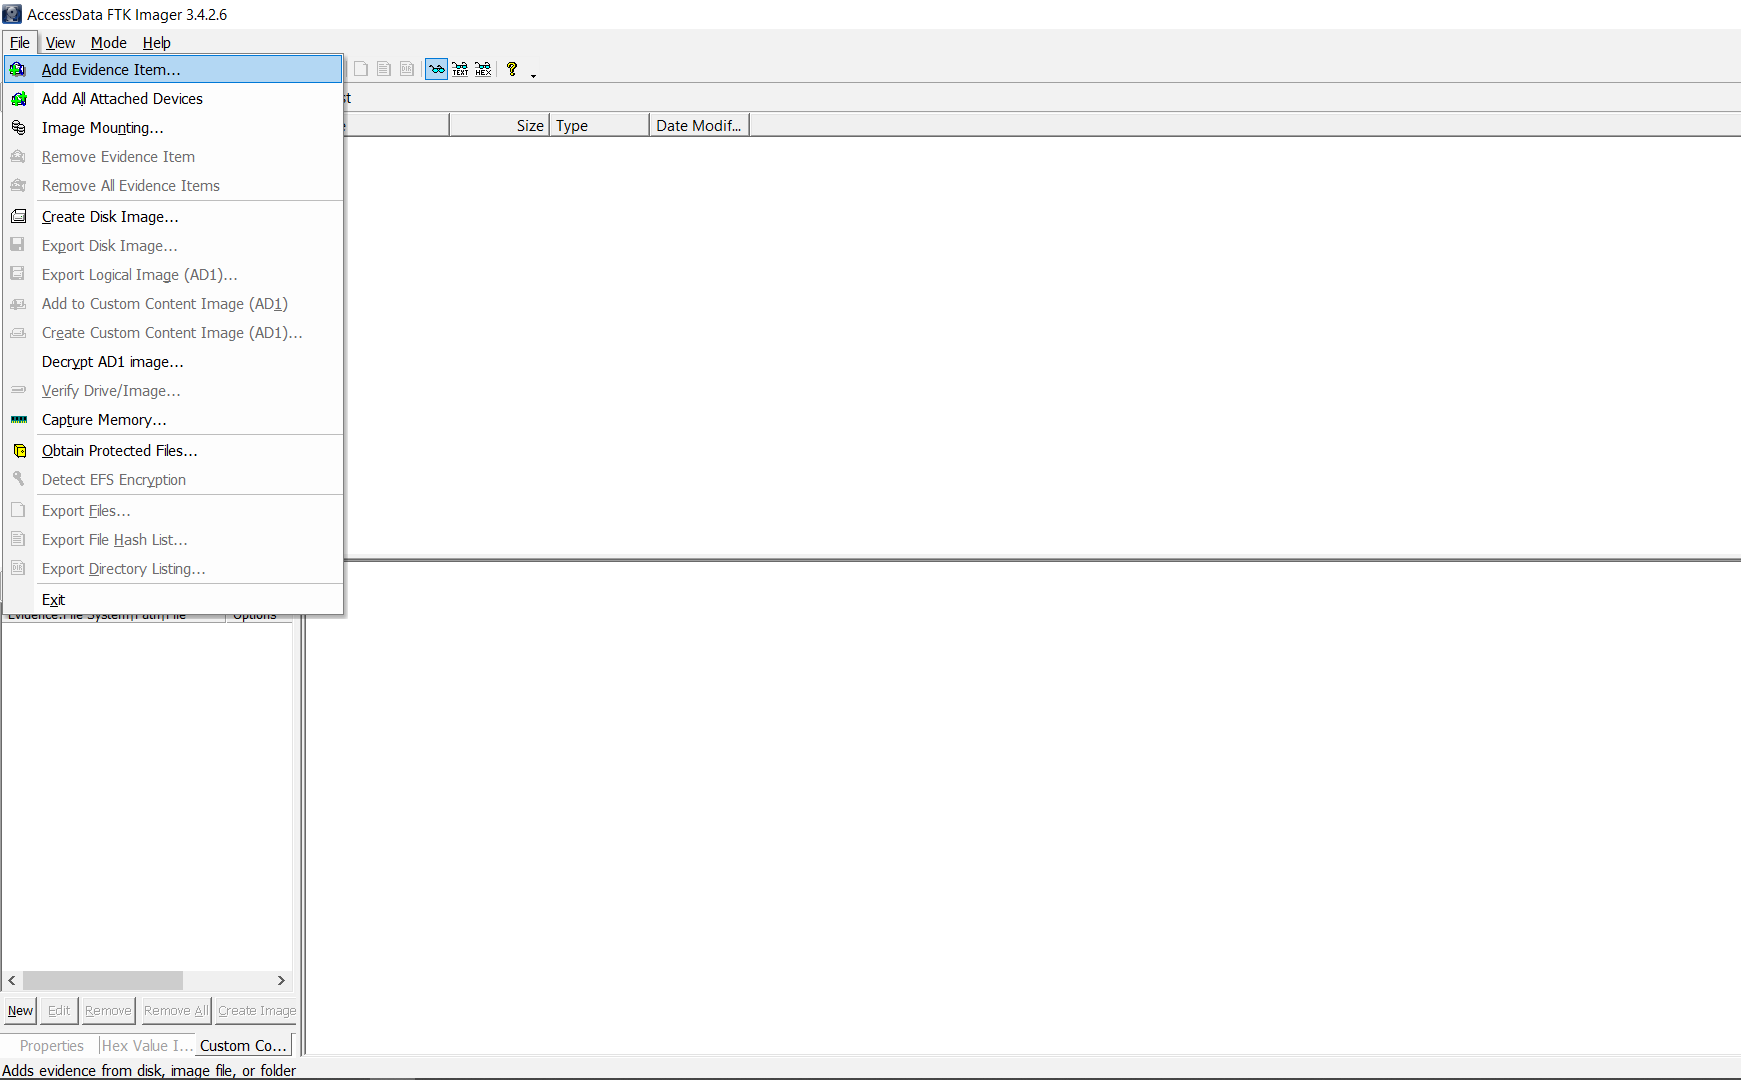
- Select Logical Drive
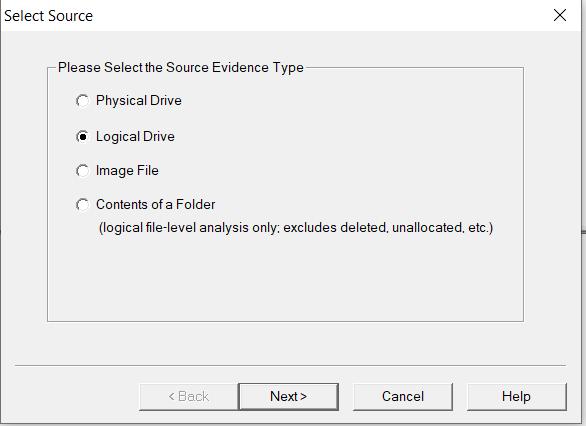
- Select Logical Drive > Next
- Select your volume, for example C, D, E or any other
- Click Finish
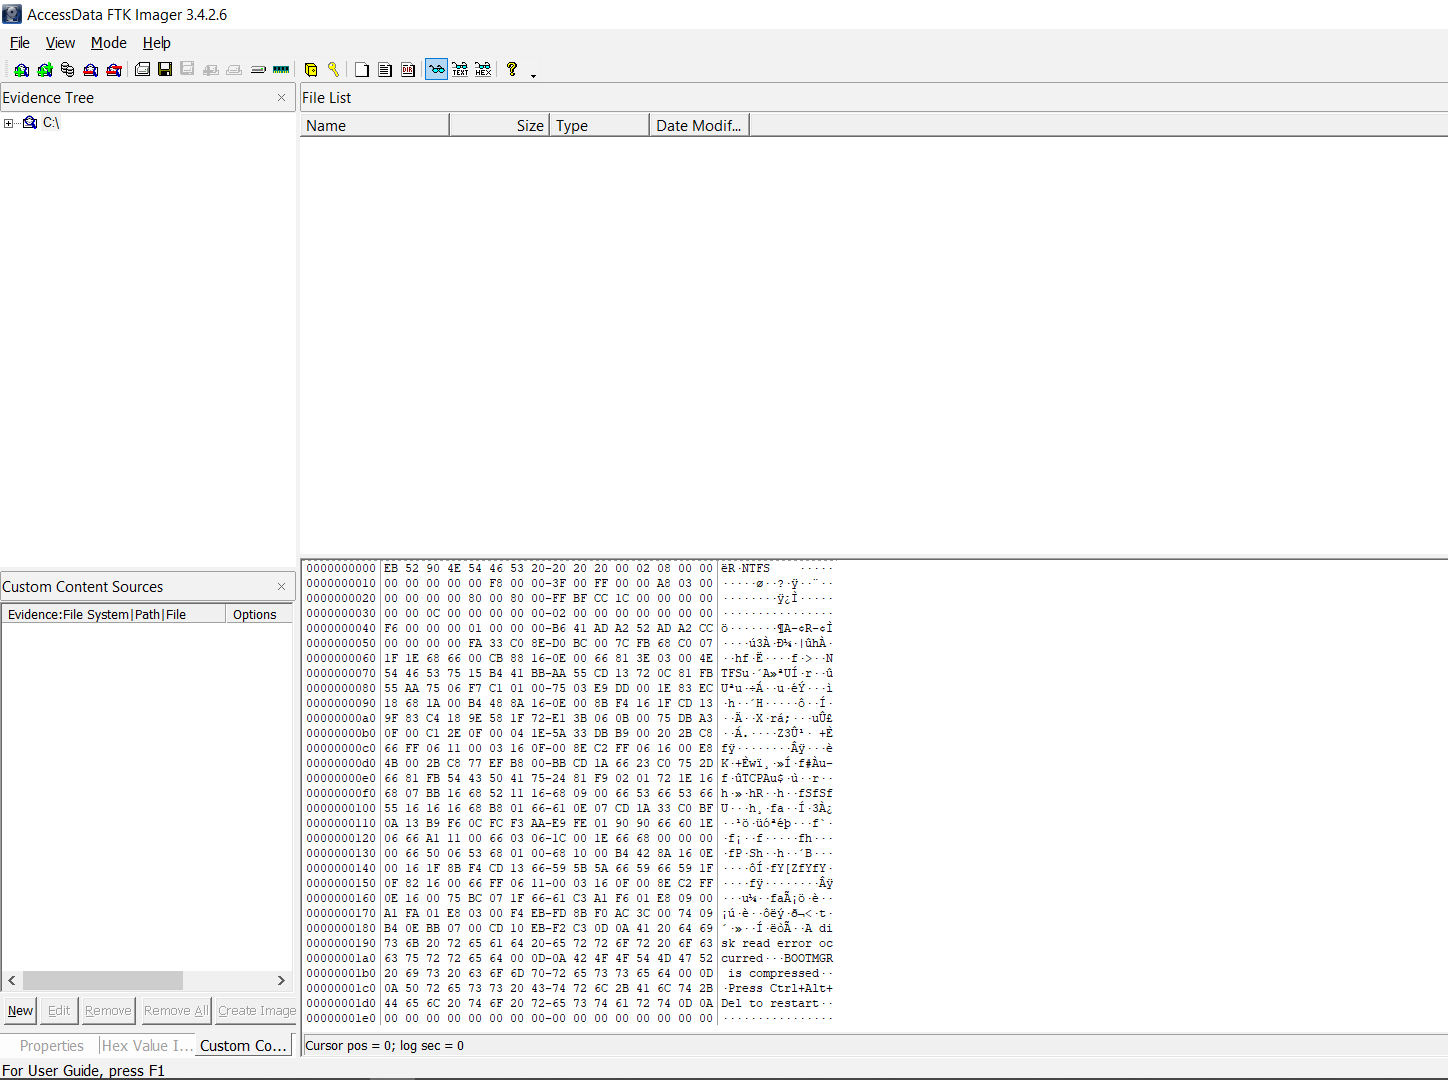
The evidence i.e. the logical disk C in my case is added to the Evidence Tree panel of the window, and the window will look like:
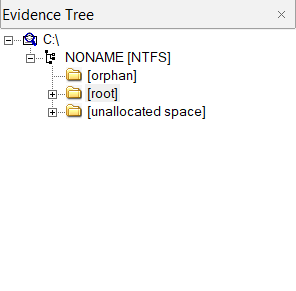
Click on + button to expand the tree to get root folder as shown in below snapshot:
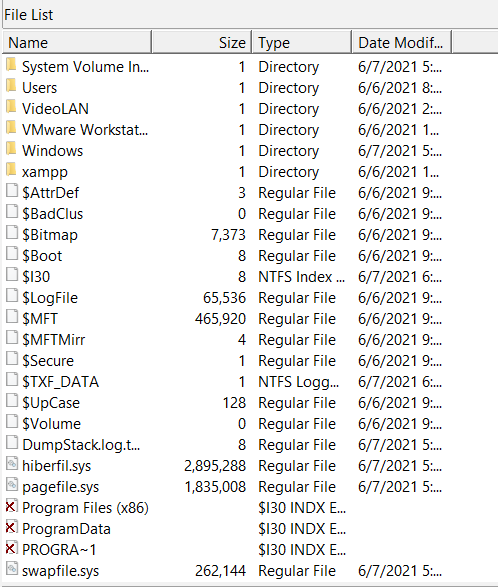
Click on root folder directory, and see the changes in File List panel of the window. Scroll down to see the files of NTFS file system, responsible to
maintain the records regarding the files directories, deleted files, boot file. Even the swap space file is visible. Hidden files are the ones marked with $ symbol in the beginning. These files are the first files to be loaded in the beginning of the disk to map everything on the disk. The snapshot below shows these files:
| File Name | Description |
|---|---|
| $AttrDef | The file contains information related to the usable space in a volume |
| $BadClus | Contains information about bad clusters in a disk. You might have seen the notification when you plug in the USB drive about “Scan disk to repair bad clusters”. The PC gets to know about bad clusters from this file only. |
| $Bitmap | It stores the flag relatd to the cluster if it is free or not. |
| $Boot | As the name suggests, this file contains the necessary information related to the device booting. So that’s why it’s present in the first cluster. Also have the addresses of $MFT and $MFTMirr. |
| $LogFile | File contains information about all the changes you do in the file system. |
| $MFT | Short form of Master File Table. The index of NTFS, having information of all the files that are present in the volume. Each volume has its own MFT, which is mapped to all the files in the volume with the location of cluster, starting point of the file, checksums etc. All this will be discussed in next blog. |
| $MFTMirr | Mirror file of $MFT first 4 records, like a backup of $MFT, $MFTMirr, $LogFile and $Volume. |
| $Secure | Each file has its own ACL in the file system, be it any mp4 file, mp3 file, image file, txt file or anything. The identical ACLs of the files are stored in this $Secure file to reduce the overhead. |
| $UpCase | It’s always 128 KB in size. Having the uppercase letters. Basic purpose of this file is to sort the files according to filenames. |
| $Volume | Contains information related to the volume. |
These are the common NTFS files that get loaded first in the clusters to bring in the functionality of file system and maintain the record of each file that is stored.
Why did I discuss this? Because this will come handy in the discussion of next blog where I will show how we can study the $MFT file and access the files from there. We will be able even to restore deleted files.
